Upload images
| Inhalt | |
|---|---|
| Sprache | |
| Betreuer |
Upload images
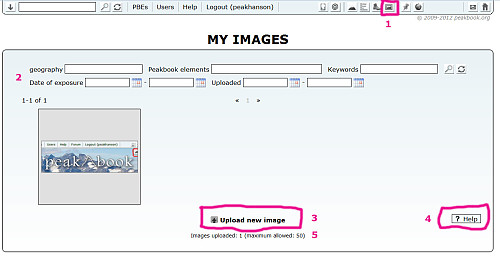
There are two ways of uploading an image to your own portfolio in peakbook:- Upload image to your portfolio via the imge button (number one in the illustration below)
- Upload image and insert into a wiki-article in one operation via the wiki-article window (described elsewhere)
If you want to upload images into your portfolio for later use in articles do the following.
- Press the image-button on the top menu bar (marked with 1 in the illustration above). You then arrive at the image portfolio window where you can browse and filter already uploaded images.
- Press the link on the bottom of the screen with the text: "Upload new image" (marked with 3 in the illustration above).
In the illustration above there's an area for filtering marked with 2, a button for instant help marked with 4 and information on how many uploads are available at the very bottom.

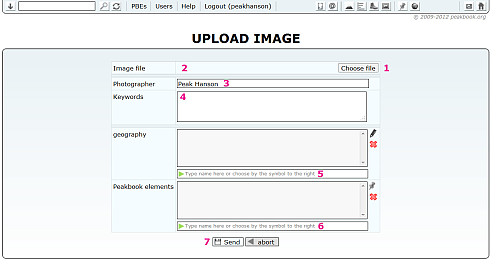
Once you have pressed the upload image button, a new box appears. A brief summary of the numbered positions from the illustration to the left above is shown here:
- Choose file(s). Click here to choose file(s). Regular members can only upload one image at a time whereas premium members can upload as many as they wish in one batch. Depending on browser you can either drag and drop files from different window or click the button and double click on the desired file(s) in the file window appearing then (you cannot drag and drop from this window).
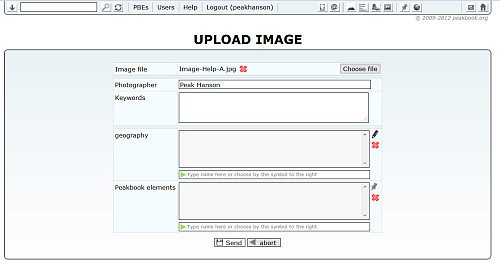
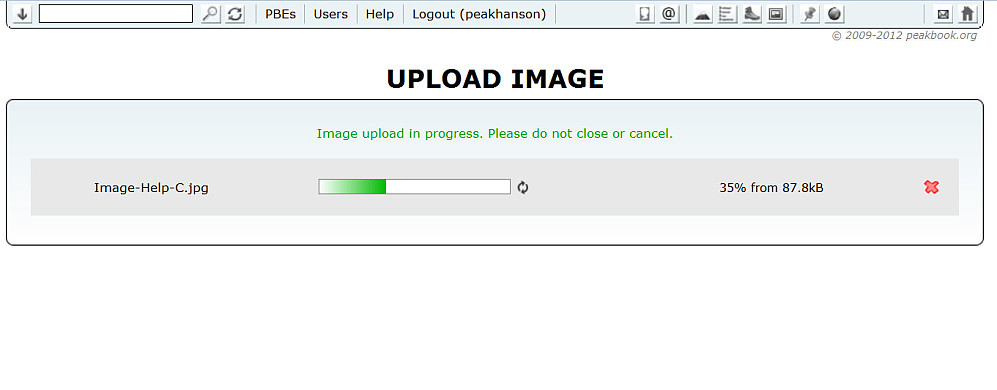
- Once you've selected files, they appear here. If you want to remove one or more files before uploading, click the red cross to the right of the file name. (See image to the right above).
- As default your name is placed in the photographer field. If the photo is taken by someone else we strongly encourage you to enter the rightful name and not less importantly be sure that you have to photographers permission to upload the image.
- If you like, type any relevant keywords here. If you do a batch upload, these keywords will be attributed to all the images in the upload.
- If you like, choose any geographical peakbook element relevant to the image(s) by typing it in the lower field and selecting, or by clicking the pencil to the right and selecting through that.
- If you like, choose any peak or other peakbook element relevant to the image(s) by typing it in the lower field and selecting, or by clicking the pencil to the reigh and select through that.
- Once satisfied, click the send button to start the upload.


Once the image upload is finished, click upload new image to upload more, or click image overview to return.


Benutzerkommentare