Personal page
| Inhalt | |
|---|---|
| Sprache | |
| Betreuer |
Personal user page
If you wonder how to return to the Peakbook main page, you achieve this by pressing the small orange PB-icon on the very right hand side of the manu bar.
Every peakbook user has his/her own page with its uniqe web adress. It is as follows:
http://peakbook.org/yourusername. It takes you to the "My tours" part of this page. It i also possible to have a web adresse entirely of your own choice if you prefere. [Les mer]
This userpage is built up like a simple blog, with an overview of your tours as the main page. It also compromises other pages like:
- My map showing all your registered ascents and other visits plotted on a map.
- My images displaying your images if you have uploaded any.
- My statistics. Later a detailed statistics section will appear here. This is still incomplete / not quite started.
- About me is a page with information about you. You are in charge of what is displayed here and to some extent how it looks.
Customizing the personal page
The content and layout is by default fixed. Furthermore if you have not entered tours or other data there are very little to be displayed. Once you register tours, and yet better write tour reports and upload images you will get a nice simple blog that can be read by everyone, also people that are not registered users on Peakbook.
If you have a premium account you may adapt the page to some extent by choosing what elements are displayed and by changing the header graphics, changing the background, changing the image of the right hand side box along with other things. We plan to increase the amount of elements you can customize in the future.
How to customize
My tours
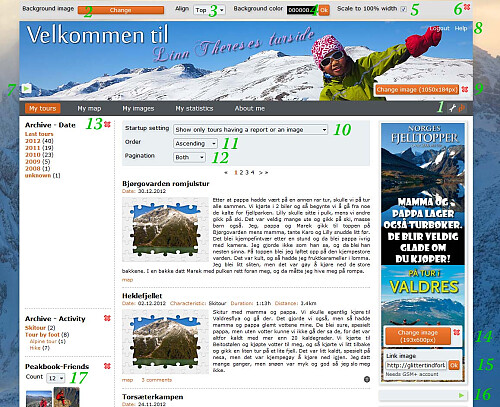
- The header image is a default image provided by Peakbook and can be changed by premium account holders
- The username is displayed on the header image. This can be hidden by premium account holders.
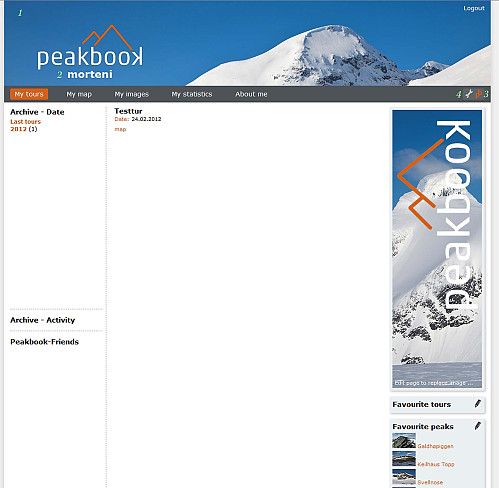
- Press the orange PB logo to return to Peakbook.org main page.
- Press the wrench symbol to enter edit mode. If your're not a premium account member you will receive a message telling you to upgrade before you can customize the page.

- Click the wrench to enter edit mode. If you do not have a premium account you will receive a message telling you to upgrade before you can customize the user page.
- When you enter edit mode, click here to upload a jpg image to use as background image. Tip: at least 1600 pixels wide, but not too wide (more than 2560 is hardly necessary).
- Vertical alignment of the background image.
- Change the background color. This affects the area not covered by your image, or the whole background if you have not uploaded an image. Remember to press the small ok button to confirm the new color.
- Check this box if you want your background image to fill the whole width of the screen no matter what screen resolution the user has.
- Always click these red crosses to hide an element. If you do this here, the default background will be displayed.
- In this example the username text has been hidden. But by pressing the green triangle it can be activated again. Always press the green triangle to reactivate hidden elements.
- This help link becomes visible once you are in edit mode and takes you to this document.
- Click here to change the header image. For best result crop the image to the recommended resolution in advance. If you have a header image and want to revert to the default one, just press the red cross.
- Here you change what tours are shown the first time the "my tours" page is shown every time. You can choose to leave out tours that do not have tour reports and images for instance.
- Here you can change the order of the tours when you navigate the menu to the left. Please observe that this does not affect the Last tours or the selection that is displayed when you first reach the page.
- Here you can decide if the navigation menu is to be shown above or below the tours or both.
- You can hide the whole menu element by pressing the red cross. Later you can revert by pressing the by then appearing green triangle.
- You can change the image on the right hand side as well. Native resolution is displayed on the button.
- You can add an external link, for instance if you want to have your own sponsor or promote other businesses or activities that you do. Please observe that this external link is only activated if you are a GSM+ user.
- This is a container that by default is hidden. You can activate it and fill it with your own image as well.
- If you choose to keep the Peakbook contact box visible, you can set how many contacts are displayed at once.
My map
There's nothing to customize under my map
My images
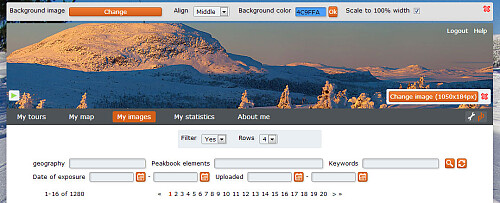
My images is a presentation of your images. Here, you or others kan browse through your images. You can adjust the number of rows with thumbs that are displayed per page. You can also decide wether the filters are shown. The filters enbables more specific searching among your images, but to some these fields may look confusing and not so neat. You can decide if they are to be displayed or not.
My statistics
This section is under construction.
About me
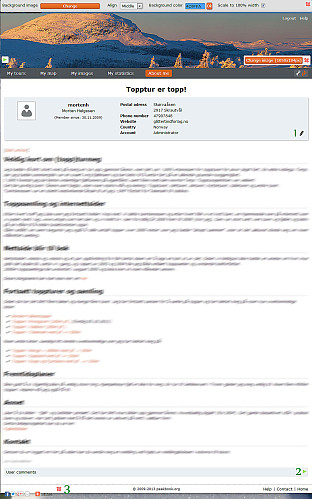
This page consists of a small fact box with your avatar and personal information you choose to make available (Your username and the date you joined peakbook are the only two pieces of information that has to be displayed.) (1) Click on pencil to go directly to the page where you can edit your profile information and what is to be displayed in the box.
Below this box there is space for an article of your own choice. Here you can write about yourself and include images, links, boxes etc. If you haven't created an article for this space, there's a link prompting you to do so.
(2) At the bottom you can choose wether other users should be able to post comments on your page or not.
(3) You can also choose if the small "share bar" shall be visible or not.
Good luck with customizing your userpage, and do not hesitate to contact us if you have any questions or feedback.
- To exit edit mode, press the wrench symbol again.
- Please be aware that sometimes you have to refresh the page to see some of the changes, especialle if you have replaced one of the images.


Benutzerkommentare