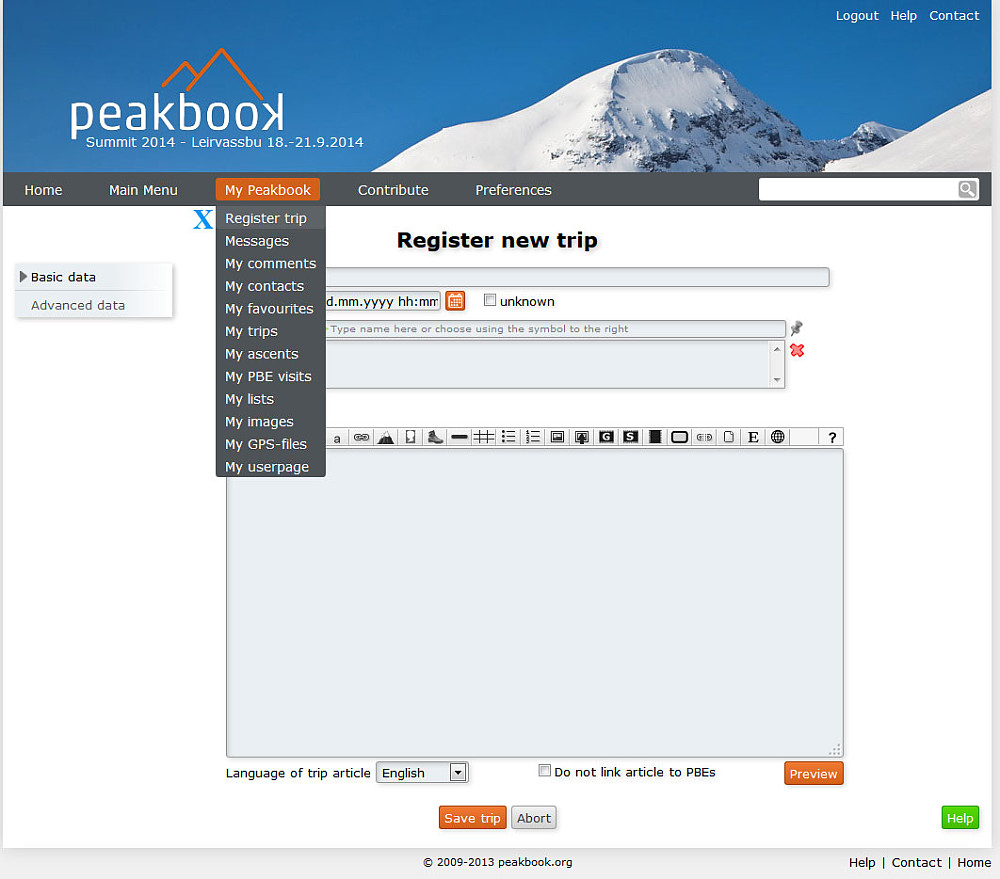
Register trip
Register new trip

The core element is trips. You need a title and a date (if you don't know the date, you simply estimate the date) in order to create a new trip. All other data is optional, however some more date will normally be wanted. For instance ascents or visits will in most cases be relevant. Every Peakbook element in the database can be registered on the trip.
You may register up to 30 ascents and visits within one trip.
If you want to write a trip report or attatch pictures from the trip, this can be done as a "wiki-article". And if you want to there are other pieces of information that can be entered.
As you continue to register more trips, they will show up in separate folders for each year. The trips can also be listed in other ways.
The process of registering the tour
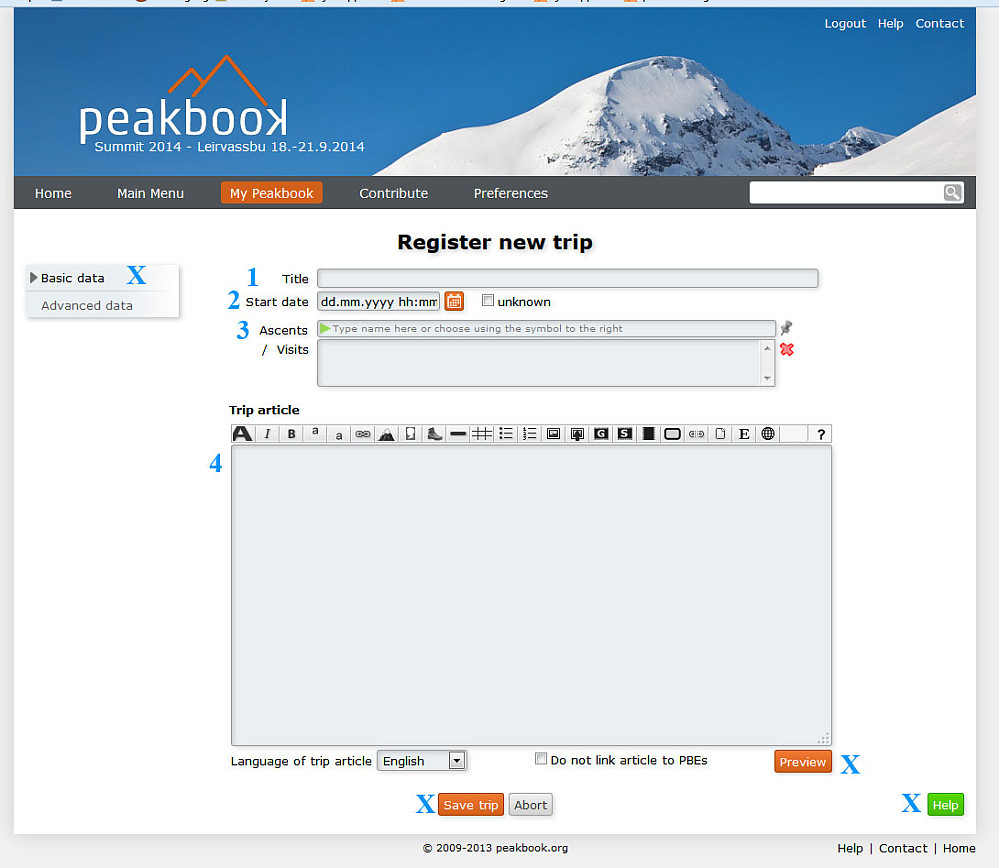
Basic data
- Title - This can be anything, but perhaps the best is something to help you recognise the trip in the listings at a later time.
- Start date - Date (and if relevant time) when the trip began in the format: dd.mm.yyyy hh:mm Example: 23.01.1988 08:00. Only date is sufficient, for instance: 23.01.1988. If you do not remember the date, write a rough date, for instance 01.01.1988 (winter tour '88) or 01.07.1988 (summer tour '88). If you prefer you may use the calendar icon to the right to select the right date. If you have absolutely no clue as to when the trip took place, you may check the unknown box. However we encourage you to use this as little as possible.
- Ascents/visits - Here you register ascents and visits done on the trip. The box is split into two parts. Type your Peakbook element inn the thin upper field with the green arrow on the left hand side. Select the element by pressing it when the suggestor displays the right one in the popup. The selected item will then move to the field below. Repeat this step more times if you want to register more elements within this trip. If you prefer you can select items on the map. To do so, open the map by pressing the map needle icon to the right of the field.
NB! There is a limit of 30 elements that can be registered per trip If you did more ascents/visits, then you will have to split the trip into several ones.
4. Pictures / report
In the big box below ascents/visits, you can write something about the trip. You can add pictures in various sizes and positions, upload images, insert videos from Youtube, add GPS-data, maps, tables and boxes. If you write more than 100 words what you write can be linked to the elements you registered.
You may write a plain unformatted text or format it with headlines, boxes and tables. The syntax is socalled wikikode with some adaptions made for peakbook.org. It is up to you if you want to write anything here, and how much you'd like to make out of it.
A more thorough description of the buttons and the possibilities can be found here.
Advanced data
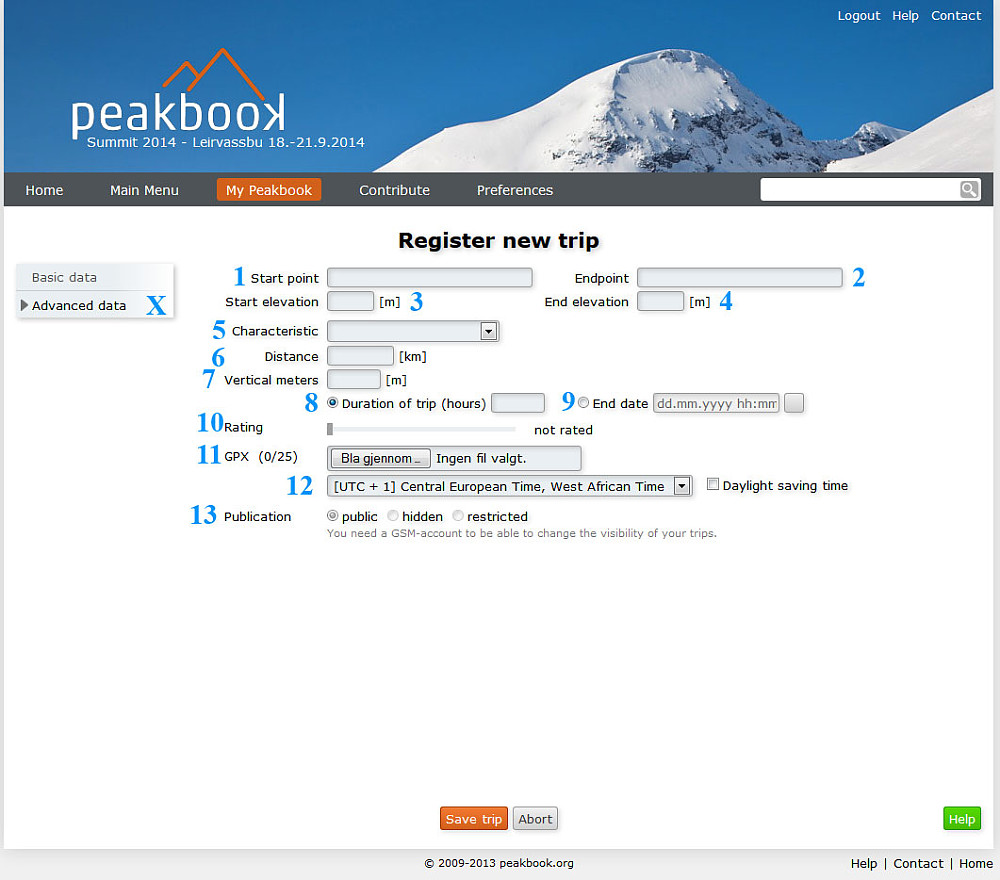
Additional information is located in a secondary form, to make the main form appear less overwhelming. If you press the button on the left hand side called advanced data, you reach this secondary form. You can switch back to the main form at any time by pressing the Basic data button. All information in this form is optional. Some of the fields will automatically be filled in if you attatch a GPS file to the trip.Some of the information added here will be displayed in the header box when you view the report later.
- Start point plain text information.
- Endpint plain text information, usually only registered if the end point differs from the start point.
- Start elevation plain text information
- End elevation plain text information and unneccesary unless the end elevation differs from the start elevation.
- Characteristic is a piece of information to caegorize your trips. It is also used to split the trips in a separate menu on your userpage.
- Distance in km. If you provide this information it will be included in your trip-length statistic. If you attatch a GPS file, you will not have to fill this out, since this is retrieved from the GPS file.
- Vertical meters is net climb during the trip. This is calculated manually or can also be retrieved from an attatched GPS file. It will be included in your statistics.
- Duration(hours) you may add length of tour in hours OR:
- End date: In stead of Duration, you can add the end date. Duration will then be calculated based on the Start date you already provided.
- Rating is a strictly personal evaluation of how good the trip was. Mostly for fun. Add your dice by pulling the slider.
- GPX gives you the possibility to select a GPX file and attatch it to the trip. Read more about GPS files in reports here..
- If you attatch a GPS track, you will also have to make sure the time zone is correct, otherwise the timestamps will be incorrect.
- Publication can only be altered by members with an upgraded account. For the time being public and hidden are the two relevant options. Tours marked as hidden are only visible to you and are not included in the general statistics.
Please also note the Family and Friends function that is not shown in this illustration.
Remember saving
NB! If you have done any changes, remember to press "Save trip" at the end. Otherwise your changes will get lost. There is no automatic saving. If you write long reports, it might be an advantage to do so in a text editor and copy it into the report editor in Peakbook in the end. If you spend too much time writing in Peakbook, you may risk being automatically logged out as the program thinks you are idle.
Step by step guide to make an advanced report
A page showing you how to make an advanced report in Peakbook.


User comments