Manual list
Creating manual lists
Manual lists are called so because they are manually put together. The content of the list are picked one by one from the database by you the way you like. There are hardly any limitations to what a manual list can be composed of.
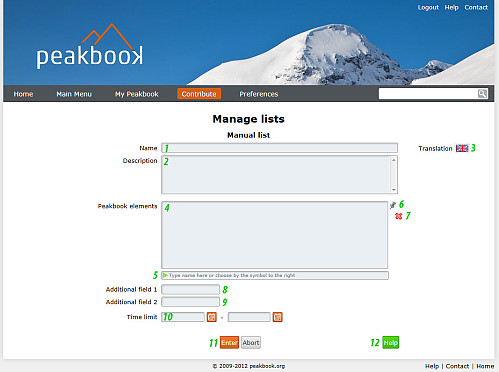
Here's a short explanation to the form:
- Name. Give the manual list a descriptive title.
- Description. Give the list a short or long description.
- The language of the list. The name and description of the list can be translated into any available language on Peakbook. The current language is identified by the flag. Click on the flag to change language.
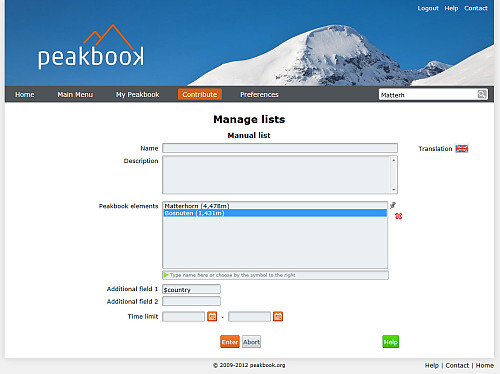
- In this big box the elements you pick will be shown after they are picked. You can not enter anything into this box, it is just a box displaying the chosen elements. Tthe only thing you can do here is to select already picked items for deletion (see 7).
- Here you can type elements you'd like to add. As you type you will see a list of suggestions if available. Select from this list, or continue typing to narrow the selection. Once you select an item, you will see it jump to the box above.
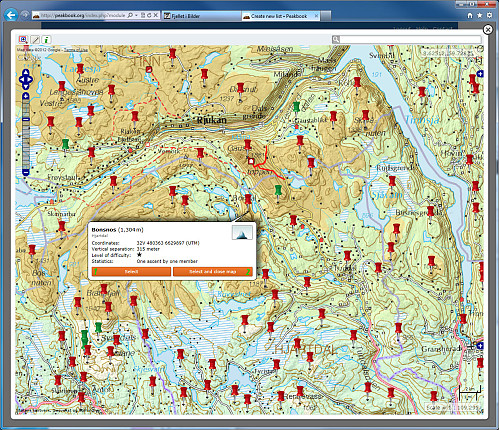
- You can also click the map needle to open a map and use the map to select elements for your list. (See also illustration further down the page.)
- Once you have selected items showing in the box and realise they shouldn't be there, you can delete them by 1) clicking on the item in the big box and then 2) clicking on the red cross.
- You can add up to two optional columns in the list. This can be any text, but we have predefined a few common variables in case you want the titles to appear in the language of the user. These are (the $ in front must be used and identifies it as a variable and not a normal text string) $country $continent $county $state $grade
- Same as above in case you need two optional columns.
- Time limit. If you want the list to only count ascents/visits within a certain period of time, then specify this here. Normally you won't want this, but in some cases this may be exactly what you need.
- Press the enter button to save the list and press the abort button to abort the whole process
- This button sends you to this article.
Editing manual lists
If you have the required rights to edit the list, you will see a pencil to the right of the list in the list overview or to the right of the list title when you view that particular list. Click on this pencil to edit the list.
If you want the list to become available to others, you can suggest it as an official list by clicking on the button called "Promote for official". We will then evaluate your suggestion and the list may be converted into an official list. By doing this you will lose full ownership of the list, but you will normally remain the adviser of the list and retain all editing rights.
Editing optional fields
If you have editing rights (you will always have this to your own private lists) you can edit optional fields. The way to do this is to open/view the list. Once viewing the list you will see the optional columns provided you gave these fields a title when creating the list. (See number eight and nine in the illustration on the top of this page).
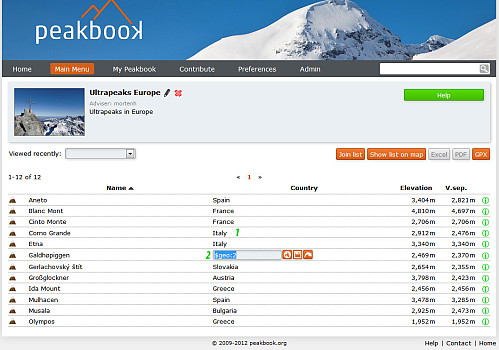
When you click on a line in an optional column it becomes editable. You can either enter a text, or you can insert a geo element. Press the save button to save the changes or the arrow to abort the operation.
If you write plain texts in these fields they become sortable, but are limited to one language.
If you use the globe icon to add a geo element you can insert geo variables if the column are to contain geographical information. The advantage of this is that the column will be adapted to the language of the user. The disadvantage is that it will make sorting less than perfect.
- Click on the desired line in the optional column to edit it.
- Here we've just used the globe icon to insert a geo variable. It looks a bit weird, but once you press to save it turns into a normal geographical name in your language.


Kommentarer